Removing the forms

The concrete is dry and yesterday was all about taking off the wood. It was a pretty labor intensive process- many nails and screws to remove, pulling planks off with a crow bar, and lots and lots of pressure washing to clean up each board so they can be used for framing the house and deck.

The concrete is revealed


Pressure washing the boards one by one


Starting the next stack of boards to dry out in the sun

Concrete day

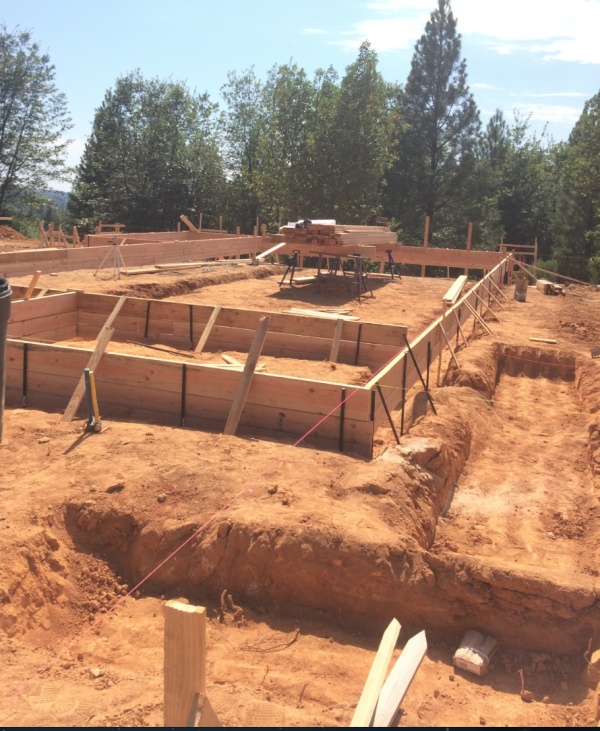
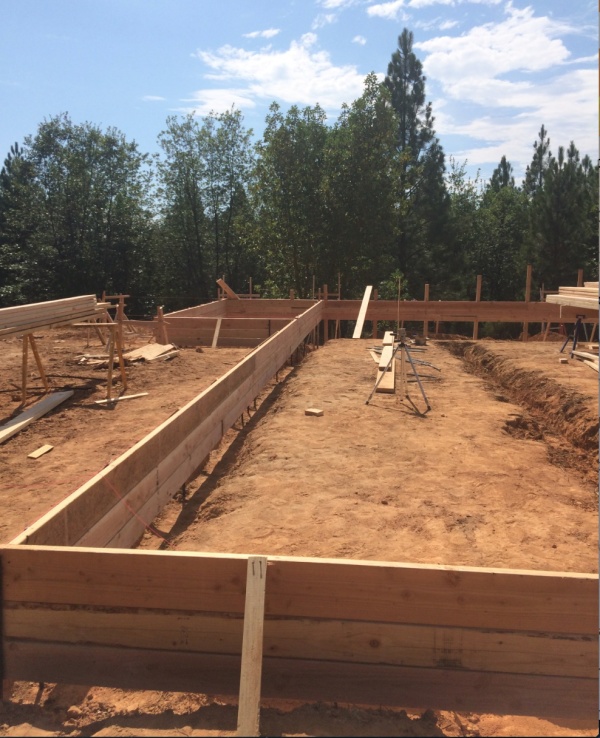
Today is the first concrete pour! The stem wall form has been taking shape and gaining more details over the last week.

First, the wall forms were built from the footing trenches up to the the level of the slab-to-be. Of course saying "they were built" leaves out all of the meticulous effort that went into measuring, putting up batter boards, defining the perimeter, getting the corners square, the top surface level, etc.


The forms are filled with a complicated network of re-bar which bends around corners, stair steps down slopes, and forms grids within the footings and stem wall. Insulation is attached to the inside surface of the perimeter to thermally isolate the stem wall from the slab (which will also be our floor). J-bolts are attached periodically along the entire wall to attach the frame. Conduits are laid in the places where we need to run water or electrical wires through the concrete. The forms also have little 2x4 pieces inserted where the doors will go so the concrete can step down slightly.


Once the first concrete truck arrived, things moved quickly. One of the concrete guys pulled the hose around the perimeter and pumped the wet mix in while the crew shoveled, vibrated, pounded, scraped and smoothed it. As each empty truck pulled away, a new one arrived to replace it. It took three full trucks (down to the last bits they could scrape out).


We went back up later tonight to see the finished day's work and were surprised to find the guys still there. They have to do all of the manipulating while it's still wet, of course, and so apparently concrete pouring day is a long and busy one (and in our case, a hot one too). Since we made it in time for the tail end of the work, we got to lend some hands (pulling out nails so the forms can come off of the dry concrete) . Finally, our first real work on the house!


Astrid got to sign her name in the pristine slab of the pump house. And a beautiful signature, it is!

The slab takes shape

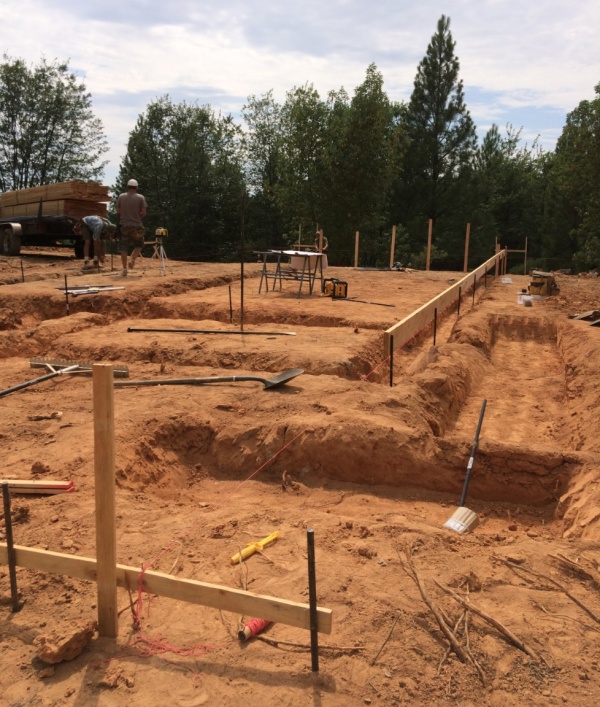
The excavators did a few more finishing touches on Monday morning. The ditches are now clean, root free and a little wider. The building team started putting up the slab perimeter that afternoon and finished on Tuesday. We can really visualize the shape and size of the house now. It looks great!


The west side of the foundation ended up being about a couple of feet taller than planned (due to the overall slope after dirt was moved during excavation). This creates a bit of a structural issue since the foundation was designed to be 36"-48" at that end and is actually 60". The two solutions are 1) dig more on the west side to make the footings wider or 2) add and compact more soil on the western exterior once the foundation is poured. That would provide a counter pressure to match the extra concrete required for a deeper slab. We will likely go with option #2 unless the compaction has to be done by the very expensive engineering firm that has been getting way too much of our money already.

Digging the footings

And it began...


Dave located the house corners, marked the exterior, and the excavator set to work, digging the footings.

There are quite a few small roots protruding in west side (mostly out of the frame, but a few are visible here). I think once they build the boundary for the footings and slab, the roots will get pushed out of the way without more digging needed. We'll find out on Monday when everyone returns from the long 4th of July weekend.

The rest of the building crew is scheduled to start work tomorrow!

Building Pad

The building pad is looking nice and smooth. It's getting easier to imagine a house sitting there.
Tomorrow they will dig the footings!


Ground has been broken!

The excavator made quick work of the stumps and boulders on our building site. It's amazing how much of a tree stump's volume is below ground- the holes are enormous and the giant bundles of roots make for a very large pile of debris.


stump pile


The boulders that they moved out of the way are huge and really cool. We will definitely use them for something later.
part of the boulder collection

moving another rock

Staged and ready

The digger arrived today! The truck that hauled it up our windy driveway was huge. It was pretty amazing that they managed to turn it around. Tomorrow at 7am, they will start digging out stumps and then leveling the the building pad over the next couple of days. They expect to be digging for the footings on Wednesday.

unloading the digger

On Friday, our builder also dropped off a trailer loaded with supplies to create the slab foundation. We are officially staged and ready to start tomorrow!
foundation supplies

Helper

Everybody loves chipping in. Astrid has been very helpful by hauling away brush and helping to clear the building site with her new little wheel barrow.


Hauling away some blackberry bushes

She doesn't look very happy but I swear this is all voluntary labor!

Side project

Since we are building novices, we decided to work on our skills with a small side project before we try contributing to the house. Ultimately, we plan to have little paths leading to benches, greenhouses, decks, guest houses, swings, and other fun little hideaways hidden across the property so a deck seemed like a good place to start. The spot we chose is south of the house- out of sight but not far. It's on a pretty sleep slope so we will eventually terrace the whole area in some fashion (raised planters, flat terraces, decks, rock walls or some combination of these things depending on how it evolves).

We are chipping away at the project slowly but surely. So far, we have dug 6 holes, poured concrete in the top row of 3, and mounted the first beam. The first beam is made of two 2x8" pieces of lumber, glued and nailed together. It is mounted directly onto fixtures in the concrete piers.

We decided to skip some steps with the second beam and we bought a 4x8" instead. It cost about twice as much for the bigger lumber but saves steps- pros and cons- we're learning as we go. That beam will be mounted on top of posts which will sit at a much lower elevation. But first, we need to pour the concrete in the lower set of holes.


The cardboard cylinders are a really cool way to keep the concrete above ground level. The hardware keeps the wood above the concrete so it always dries out adequately.

Electricity

A quick update on the electricity saga- things were moving so slowly that we actually re-considered making a push to go off grid. The more we researched, though, the less appealing it became. There is something so simple and attractive about the idea of building a self sufficient little oasis but the reality is that off grid systems are still very expensive, require regular maintenance, frequent (expensive) battery replacement, elaborate (expensive) back up generators and, in our case, would prompt many changes to our house design (adding gas lines in the slab, a propane tank, different appliances, new concerns about venting).

But things just turned around- the neighbor finally got back to us about getting an easement to connect to his power pole. His engineer checked it out and he gave us the go ahead. This makes hooking into PG&E so much easier and cheaper. We've been in wait mode for over a month on this even though it's one of our most urgent issues and now we can finally move forward. It's a huge relief.